Thursday, July 17, 2014

Classroom Lamps *Makeover*


The first look out of my classroom windows showed me a beautiful hill with big trees and a cute little picnic table.  As my first year of teaching disappeared so did the beautiful view out of my windows. Our school built a massive $11 million expansion on our school and they attached it right to the outside of my windows! I was one of two classrooms that lost all of their windows.  Well I didn't actually 'lose' my windows.  They're still there but they look into the middle school lobby and office area.  

All of the light in my room comes from fluorescent lights. Last year I had five lamps and I only turned on one set of fluorescents. This year, my goal is to have enough lamps that I don't have to turn on the fluorescents at all! 

This means I need to hit the thrift stores.  I have picked up quite a few lamps. I wanted them all to be wooden (so they couldn't get knocked over and break.) Unfortunately there aren't many pretty wooden lamps out there. But that's okay because we can fix that!

First step: Spray Paint!

Here are the materials I use when spray painting lamps.


I cover the electrical parts like the cord and the top where the light bulb gets plugged in with cling wrap.  Then I secure that in place with painter's tape. 


Then I take them outside and give them a good coat (or two) of paint.


Step Two: Lamp Shades

All thrift stores have TONS of lamp shades.  I like to find shades that fit the lamps I have and shades that have a flat surface.  If the surface is flat I can cover it with some cute fabric!

This is how I cover lamp shades with fabric.  You will need fabric of your choice and spray adhesive.  I use this 3M brand that I love! You can immediately work with it after you spray it and it takes 10 minutes to dry so you have plenty of time to work with it. Many of the sprays have you wait 5 minutes before you can work with it. 


To cut your fabric to size, lay out your fabric and sit the lamp shade, on it's side, on the fabric.  Use a pen to trace the outside as you roll the shade across the fabric. 


Then I cut the fabric leaving about an inch between the cut and the line I made.


Spray the lamp shade with the spray adhesive.

Lay the shade down on the line that you marked.


Use your hands to smooth the fabric out around the shade.  
You will have extra fabric hanging off the top, bottom, and seam.


First trim the seam so you have about an inch of fabric.


Spray a line of spray adhesive and fold the fabric over.


This is what the seam will look like. 


Next spray some adhesive around the inside edge of the shade.


Tuck the edges in.


On the top side you will need to cut little slits in the fabric so it will tuck in.  If it's not staying stuck to the adhesive, cut the slit smaller.


Now your shade could be completely done at this step.


Or you can add some decorative trim.  I like to raid my grandma's rick rack bucket.

Use a hot glue gun to adhere the trim to the shade in whatever pattern you wish!


Here is the finished product!


Here are some lamps that I made last school year.


And... I was at the Dollar Tree and found these cool anti-slip mats.  I am going to put them under the lamps so they don't slip and slide around.


I hope your lamps turn out awesome!!


Tablet Case


Sometimes the power tools I use happen to be sewing machines! 

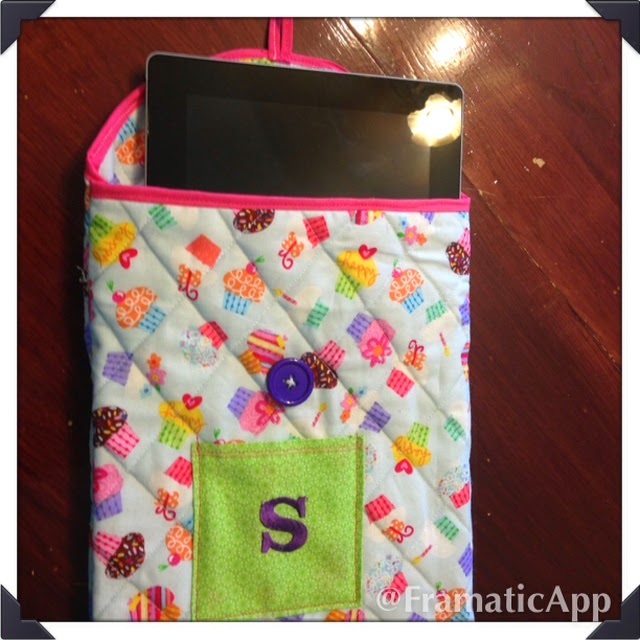
This week I got a new tablet.  I needed a case for it but the ones at Best Buy were over $30! And they weren't very cute.  So Grandma and I went to work. 


I wanted to make a thick case so it would keep my tablet safe in my school bag.  So I sandwiched a piece of batting in between two pieces of fabric. I sewed diagonal stripes across the fabric about an inch apart.  Then I did the same thing the other way. 
Here is a close up of the quilting. 


We used the embroidery machine to put an S on the front pocket.  We sewed the pocket down to the quilted piece. 


Then I folded the piece of fabric in half to make a sleeve to fit my tablet. I cut one side across and the back side curved to make the flap.  

My grandma sewed pink casing around the edge to finish it off.


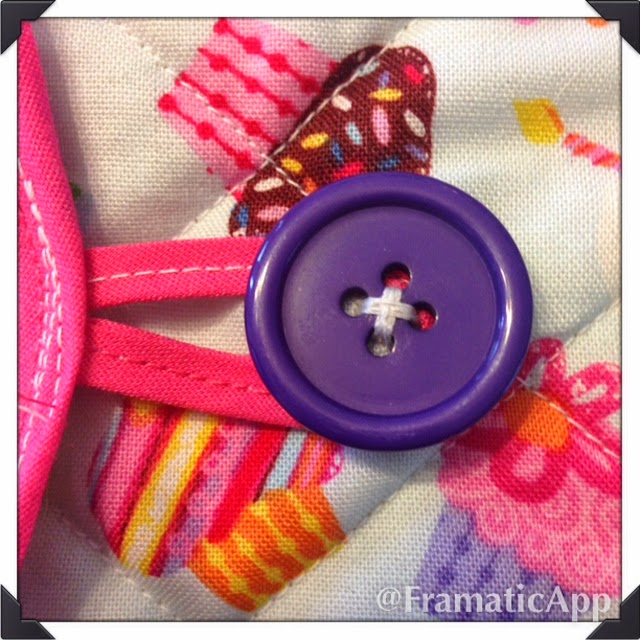
When sewing the casing, she made a little loop for the button.

Last step I sewed on the button.


And, TaDa! A Tablet case that cost me absolutely nothing! 


Pots and Pans Rack


I don't know about you, but I hate digging around in a low cabinet to get to my pots and pans.  We don't have a ton of storage in our kitchen so all of our pots and pans were crammed in the same cabinet with a bunch of other things.  We did have a blank wall just waiting to be useful, so I went to work. 

At the hardware store I bought three plant hooks that you would hang from the ceiling, a dowel rod, and  a bunch of 's' hooks. 

I found the studs and screwed in the three hooks.  Use your level to make sure the hooks are level. I painted the dowel rod black and hung it on the three hooks. 

Next I hooked an 's' hook through the handle of the pan and attempted to hook it onto the dowel rod.  And isn't it just my luck, the dowel rod was too thick to fit the 's' hook around it.  Since I had already been to the hardware twice today I searched my house for a substitute. 

I found a piece of wood.  It is 1/8 of an inch thick and three foot long. It fit nicely on the hooks, the 's' hooks fit nicely on the board and the pan lids fit behind the board.

Now a don't have to dig around a low cabinet searching for my pots, pans, and the right lids!


Monday, July 14, 2014

Bookshelf to Bench

It has been so long since I've written a post on here! I have been in the middle of a few different projects and hadn't finished any of them yet! So today I spent some time tying up loose ends. 
Here is finished project number one: Bookshelf to Bench. 


So you might recognize this white shelf. I had all of my DVDs stacked on it before I made those awesome DVD shelves


I wanted to make a little reading nook in my classroom and I thought this would be the perfect thing! It has a comfy spot to read and storage for books! 

So first thing I had to do was get a board for the back.  I wanted to make sure the shelf was sturdy enough to hold little bodies and I didn't want anything to slide through the back.  So I went to Restore and picked up a shelf for $2. 
Here is Muca testing out the structural integrity of the shelf. I think she looks like she's walking the plank! 


I measured the length of the shelf then cut my board to match.

Now I didn't want a boring brown back on this white shelf so I decided to cover it with fabric. 

Step One: Cut fabric to fit.
Use staple gun to staple one long edge of fabric. 


Step Two: Wrap fabric around. Staple 2-3 securing staples on the back edge. 
Fold extra fabric over on the skinny edge making sure to tuck the unfinished edge of the fabric under.  Secure with staples every 5-6 inches. 


Step Three: Wrap the edges like a present!


Tuck the edges just like above. 


Now that you have the board covered in fabric it is time to attach it to the shelves. 
DO NOT USE SCREWS. 
I used nails to attach this back board.  
The reason is because screws twist up the fabric and turns it into a tangled mess!
So lay the board down on the back of the shelf and nail it all around the edges. I put the nails 8-10 inches apart. 


*Side note* These shelves come with adjustable shelves.  I already used screws to attach the inner shelves to the outside. If you have not done this, now would be the time.  Simply use screws or nails to go through the outside in through the sides of the shelves. 

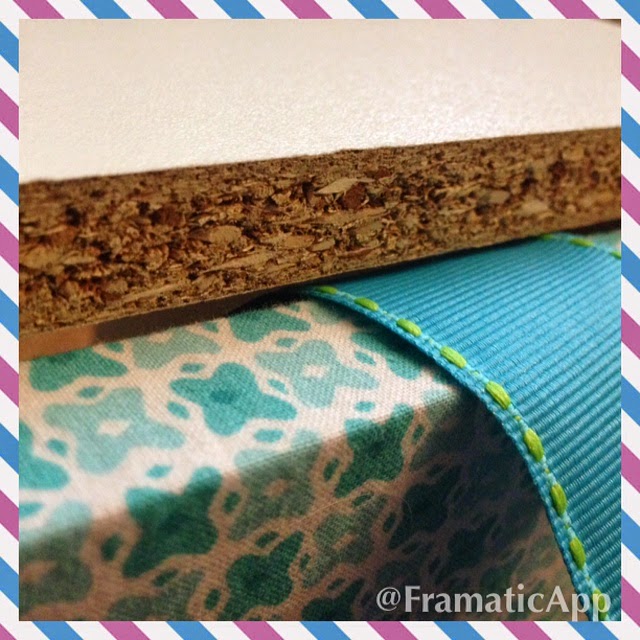
I left a little gap between the top of the shelf and the back board.  The reason was to be able to slide ribbon through so I can attach the top pillow.  I know my kiddos would have that pillow all over the place and I wanted it to stay where I put it! 


Add the pillow on top, wrap ribbon around, and tie cute little bows!

Ta-Da! Simple tille 20 minute project!


Thanks for stopping by!