It has been so long since I've written a post on here! I have been in the middle of a few different projects and hadn't finished any of them yet! So today I spent some time tying up loose ends.
Here is finished project number one: Bookshelf to Bench.

So you might recognize this white shelf. I had all of my DVDs stacked on it before I made those awesome DVD shelves.

I wanted to make a little reading nook in my classroom and I thought this would be the perfect thing! It has a comfy spot to read and storage for books!
So first thing I had to do was get a board for the back. I wanted to make sure the shelf was sturdy enough to hold little bodies and I didn't want anything to slide through the back. So I went to Restore and picked up a shelf for $2.
Here is Muca testing out the structural integrity of the shelf. I think she looks like she's walking the plank!

I measured the length of the shelf then cut my board to match.
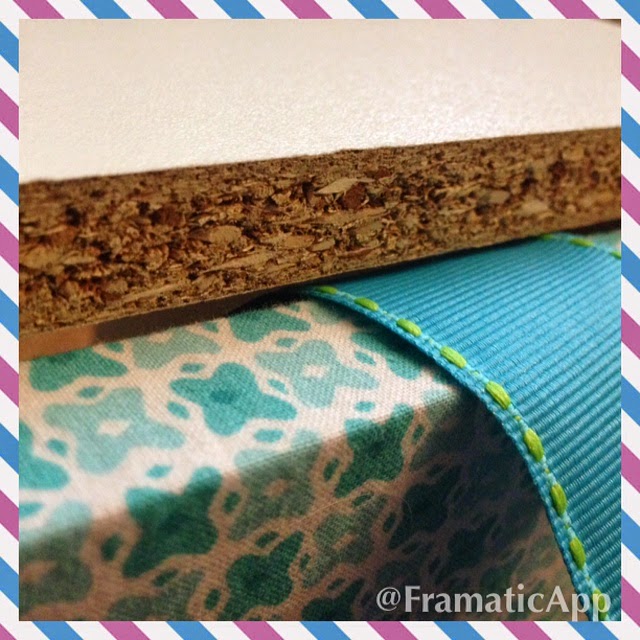
Now I didn't want a boring brown back on this white shelf so I decided to cover it with fabric.
Step One: Cut fabric to fit.
Use staple gun to staple one long edge of fabric.

Step Two: Wrap fabric around. Staple 2-3 securing staples on the back edge.
Fold extra fabric over on the skinny edge making sure to tuck the unfinished edge of the fabric under. Secure with staples every 5-6 inches.

Step Three: Wrap the edges like a present!

Tuck the edges just like above.

Now that you have the board covered in fabric it is time to attach it to the shelves.
DO NOT USE SCREWS.
I used nails to attach this back board.
The reason is because screws twist up the fabric and turns it into a tangled mess!
So lay the board down on the back of the shelf and nail it all around the edges. I put the nails 8-10 inches apart.


*Side note* These shelves come with adjustable shelves. I already used screws to attach the inner shelves to the outside. If you have not done this, now would be the time. Simply use screws or nails to go through the outside in through the sides of the shelves.
I left a little gap between the top of the shelf and the back board. The reason was to be able to slide ribbon through so I can attach the top pillow. I know my kiddos would have that pillow all over the place and I wanted it to stay where I put it!
Add the pillow on top, wrap ribbon around, and tie cute little bows!
Ta-Da! Simple tille 20 minute project!
Thanks for stopping by!
No comments:
Post a Comment